Making the 1955 Sheath Dress
My experience making this dress.
VINTAGE RELEASESCUSTOM FABRICS
1/31/20251 min read
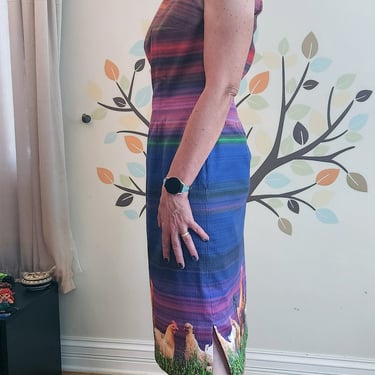
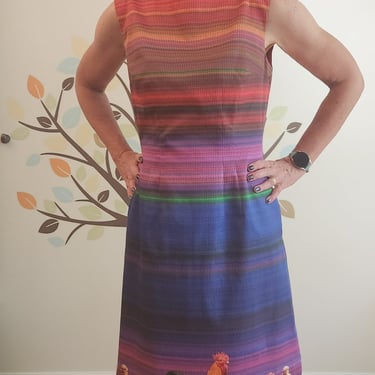
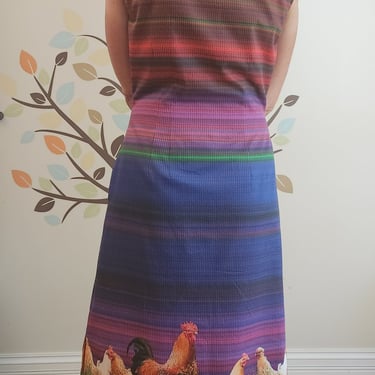
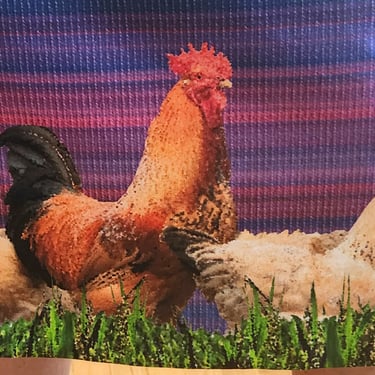
I made this dress twice. The first version was View A using my Chicken Stripe fabric in a cotton sateen. I made this dress a little shorter and lined it. When lining the dress, I used the armhole facings but inserted them over the lining pieces. I also used swing tacks at the bottom of the lining pieces to hold the lining in place. I think the dress worked well with this print. The stripes line up perfectly with the darting and look nice with the style – and the chickens are a fun surprise.
I did drop the armholes and darts on the dress but could have taken the bodice in more. I am more pear shaped than the hourglass needed for this pattern. I also thought the front neckline hit a little high. No worries – I had already purchased fabric to make View C of this pattern!
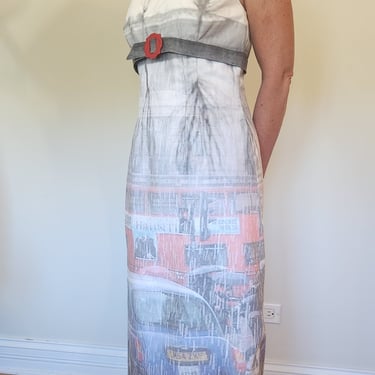
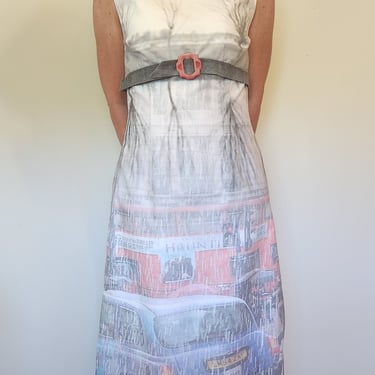
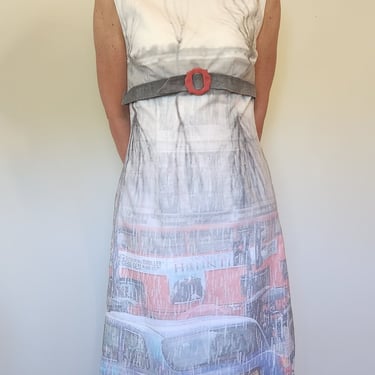
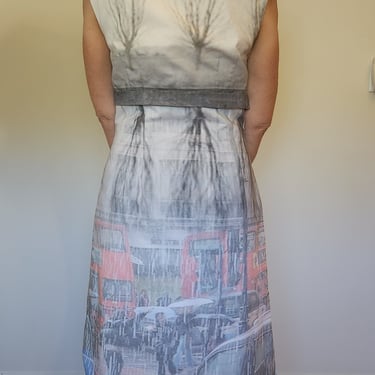
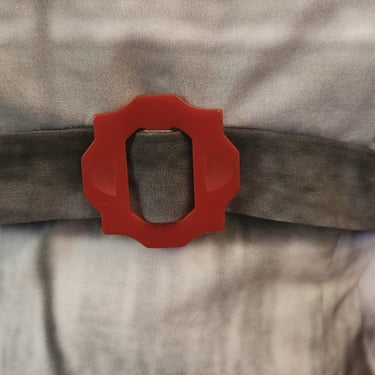
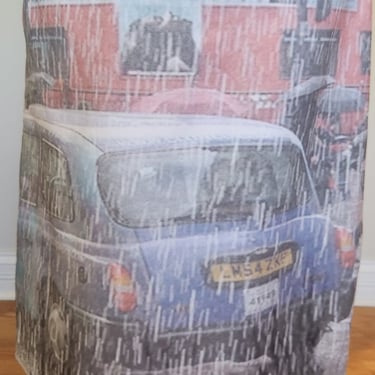
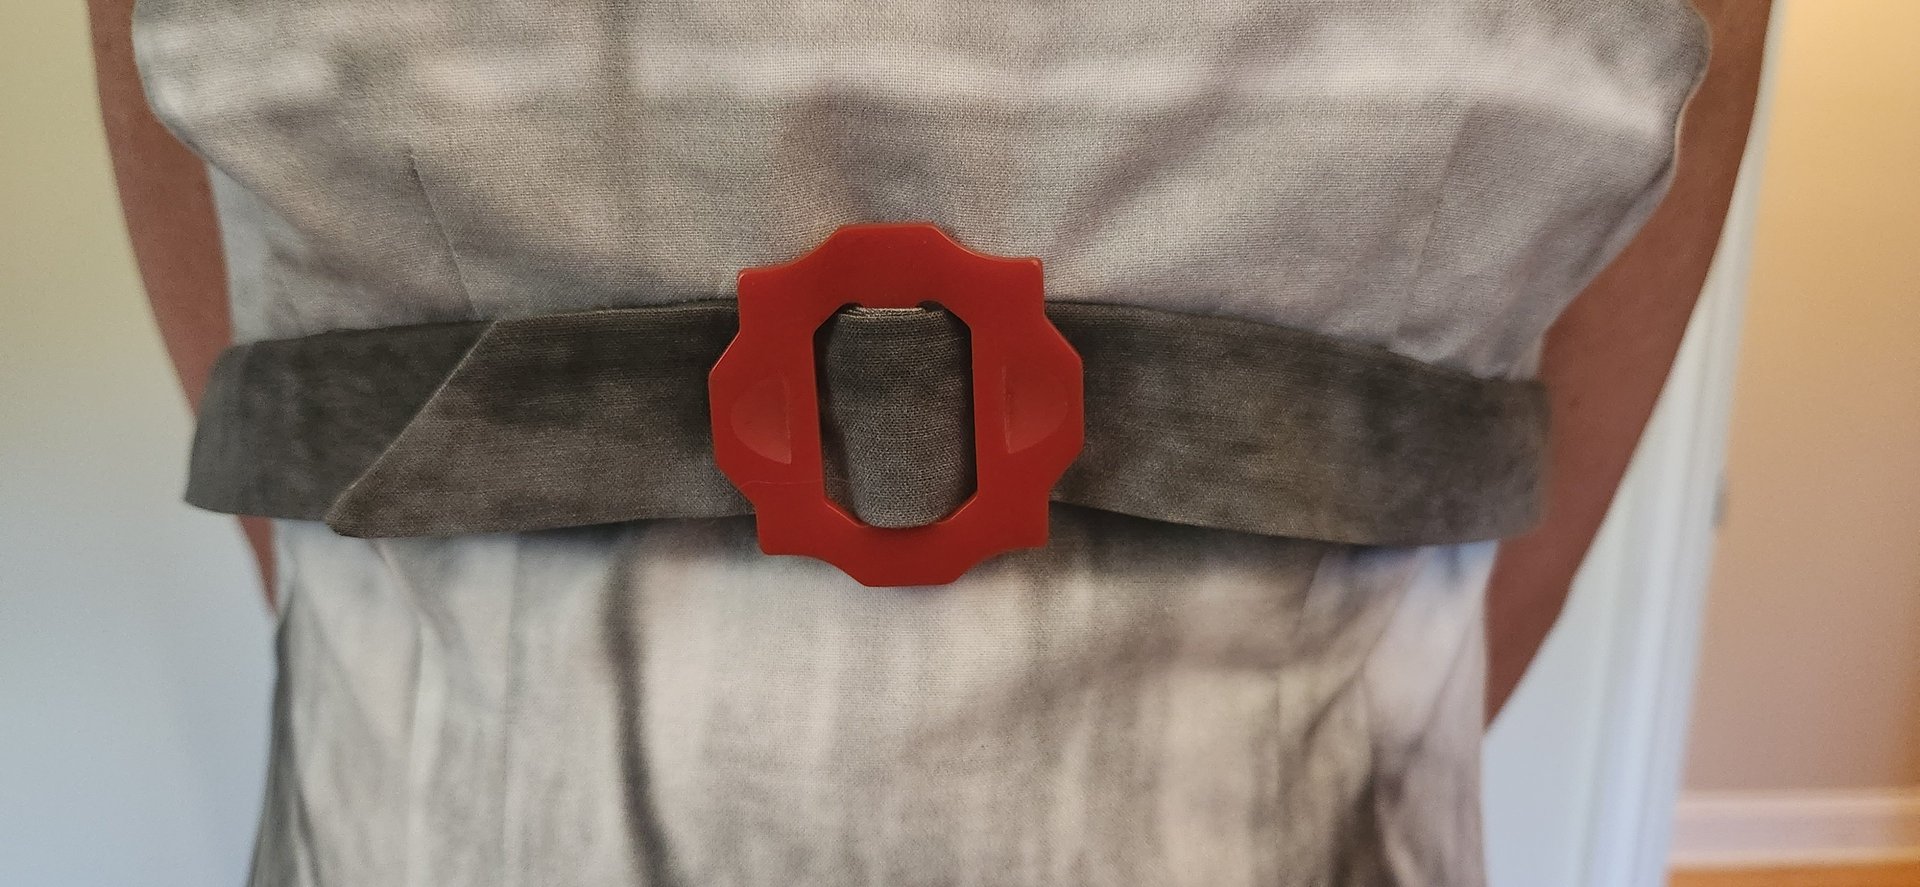
I made the next version using my Rainy London large scale print. Due to the narrow repeat, I needed 4 yards for this slim dress. I think it was worth it. I did cut the belt on the straight grain rather than the diagonal as I wanted to use the grey stripe in the fabric.
Since the lining pieces are bonus pieces I was planning on adding to the pattern, I tried another method for this dress where I left off the armhole facings and sewed the lining to the skirt at the slits. I think this was more successful though a bit more difficult to accomplish. I also adjusted the bodice width, neckline and length from my first attempt.
This second dress turned out exactly as I imagined! I used a vintage bakelite buckle from my stash for a fun pop of color. I love wearing both dresses. They are very comfortable and easy to sew up, especially without the lining. I ended up modifying the lining and facing pieces to create a one piece facing. I adjusted the instructions to reflect the new pieces for those who prefer a lining. I highly recommend trying this pattern.